Flow Rules
Flow Rules give fine-grained control over how devices on the LAN use the internet, for example “R&D: block cloud drive downloads”. Based on who (a device, device group or network) is accessing what (an application or URL), a rule decides whether to deny, allow or use a specified exit, and can also set rate limits and an active schedule.
Flow Rules cover only the application layer and people. Network-layer rules based on address, port and zone are configured in Policy Table. Flow Rules run on FlowEngine.
Before you start, sign in to the device as described in Sign in to the gateway admin console.
1. Open Flow Rules
In the left navigation, select 设置 → CONNECTIVITY → Flow Rules (Settings → CONNECTIVITY → Flow Rules), then turn on the Flow Rules switch at the top left of the page.
The top of the page shows:
- 规则总数 (Total rules): includes block, allow and exit rules.
- 已启用 (Enabled): disabled rules aren’t matched.
- 今日命中 (Hits today): the total number of hits for all rules today.
In the tabs below, 规则 (Rules) is the rule list, while 应用库 (App library), 网址组 (URL groups), 时间计划 (Schedules) and 终端组 (Device groups) manage the applications, URLs, time periods and device groups referenced in rules.
Rules are matched from top to bottom, and matching stops at the first hit. Rate limits and quotas are additional settings for the 放行 (Allow) and 出口 (Exit) actions.
2. Create a rule
Click 新建规则 (New rule) at the top right, or, if there are no rules yet, click 新建第一条规则 (Create first rule).
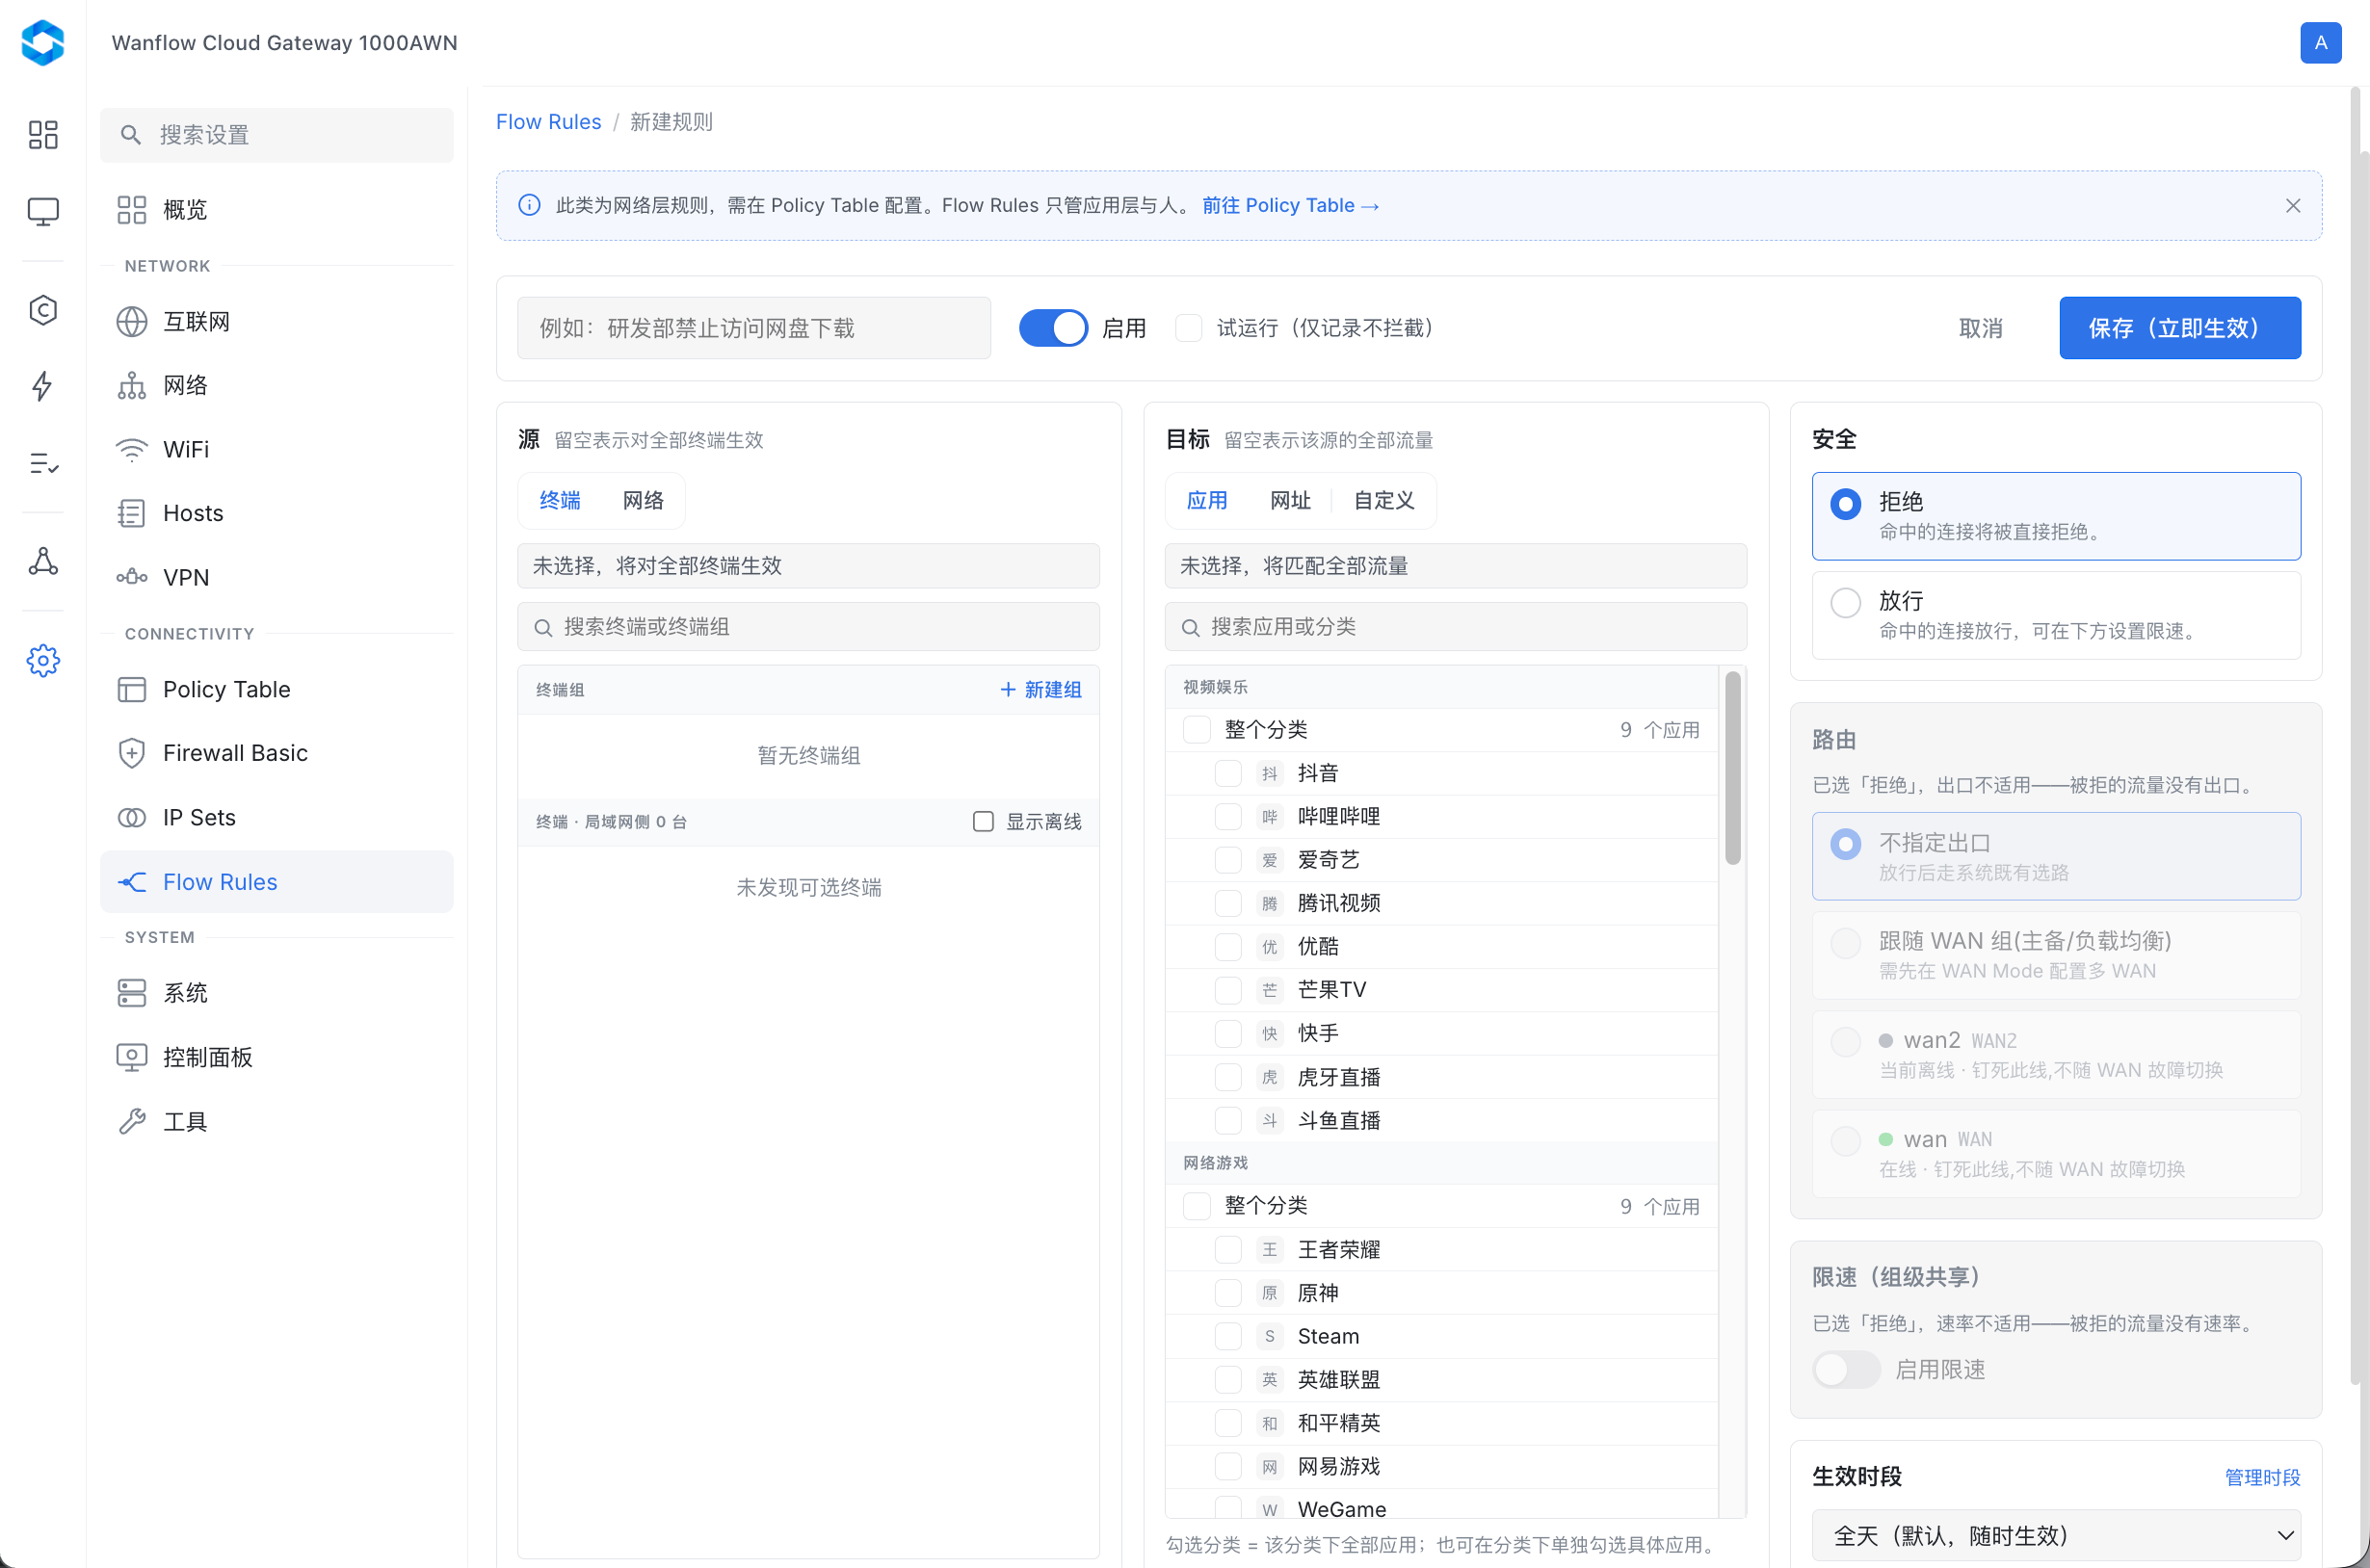
- Enter a rule name, for example “研发部禁止访问网盘下载” (R&D: block cloud drive downloads).
- Choose the source: under 终端 (Devices) or 网络 (Networks), choose what the rule applies to. You can choose a single device or a device group, or click 新建组 (New group). Leave it empty to apply to all devices.
- Choose the destination: under 应用 (Apps), 网址 (URLs) or 自定义 (Custom), choose what access to control. Applications are listed by category (such as video and entertainment, or online games). Selecting 整个分类 (Entire category) selects every application in that category; you can also select individual applications. Leave it empty to match all traffic from the source.
- Choose the action:
- 拒绝 (Deny): matching connections are refused.
- 放行: matching connections are allowed, and you can go on to set routing and rate limits.
- Set routing (optional, Allow only):
- 不指定出口 (No specified exit): after being allowed, traffic follows the system’s existing route selection.
- 跟随 WAN 组(主备 / 负载均衡) (Follow WAN group (primary/backup / load balancing)): requires multi-WAN to be configured first.
- 指定某条线路 (Specific line): always uses this line and doesn’t fail over when the line fails.
- Set a rate limit (optional, Allow only): turn on 启用限速 (Enable rate limit). The rate limit is shared at the group level.
- Set the active schedule: rules are active all day by default. You can also choose a schedule so the rule turns on and off automatically during the scheduled periods. Click 管理时段 (Manage periods) to edit schedules.
The bottom of the panel summarizes the rule in one sentence, for example “将对【全部终端】访问【所有流量】的流量执行【拒绝】,全天生效” (Apply 【Deny】 to traffic from 【All devices】 accessing 【All traffic】, active all day). Before saving, check that this sentence matches what you expect.
3. Save and verify
Click 保存(立即生效) (Save (takes effect immediately)). The rule takes effect as soon as it’s saved.
If you’re unsure about a rule’s impact, select 试运行(仅记录不拦截) (Dry run (log only, don’t block)) first: the rule only logs hits and doesn’t actually block anything. Once the hits look as expected, turn off the dry run.
In the rule list, you can view each rule’s status, hits today and last hit time.