Sign up and create an organization
Everything in the Wanflow Console belongs to an organization: devices, services and bills all belong to an organization. So when you use Wanflow for the first time, you need to do two things — create an account, then create or join an organization.
Wanflow Console: https://console.wanflow.com/. If you already have an account, sign in here.
- A mainland China mobile number that can receive SMS verification codes
- If a colleague has already created an organization, ask the organization admin for an invitation link
Step 1: Create an account
- Open the sign-up page
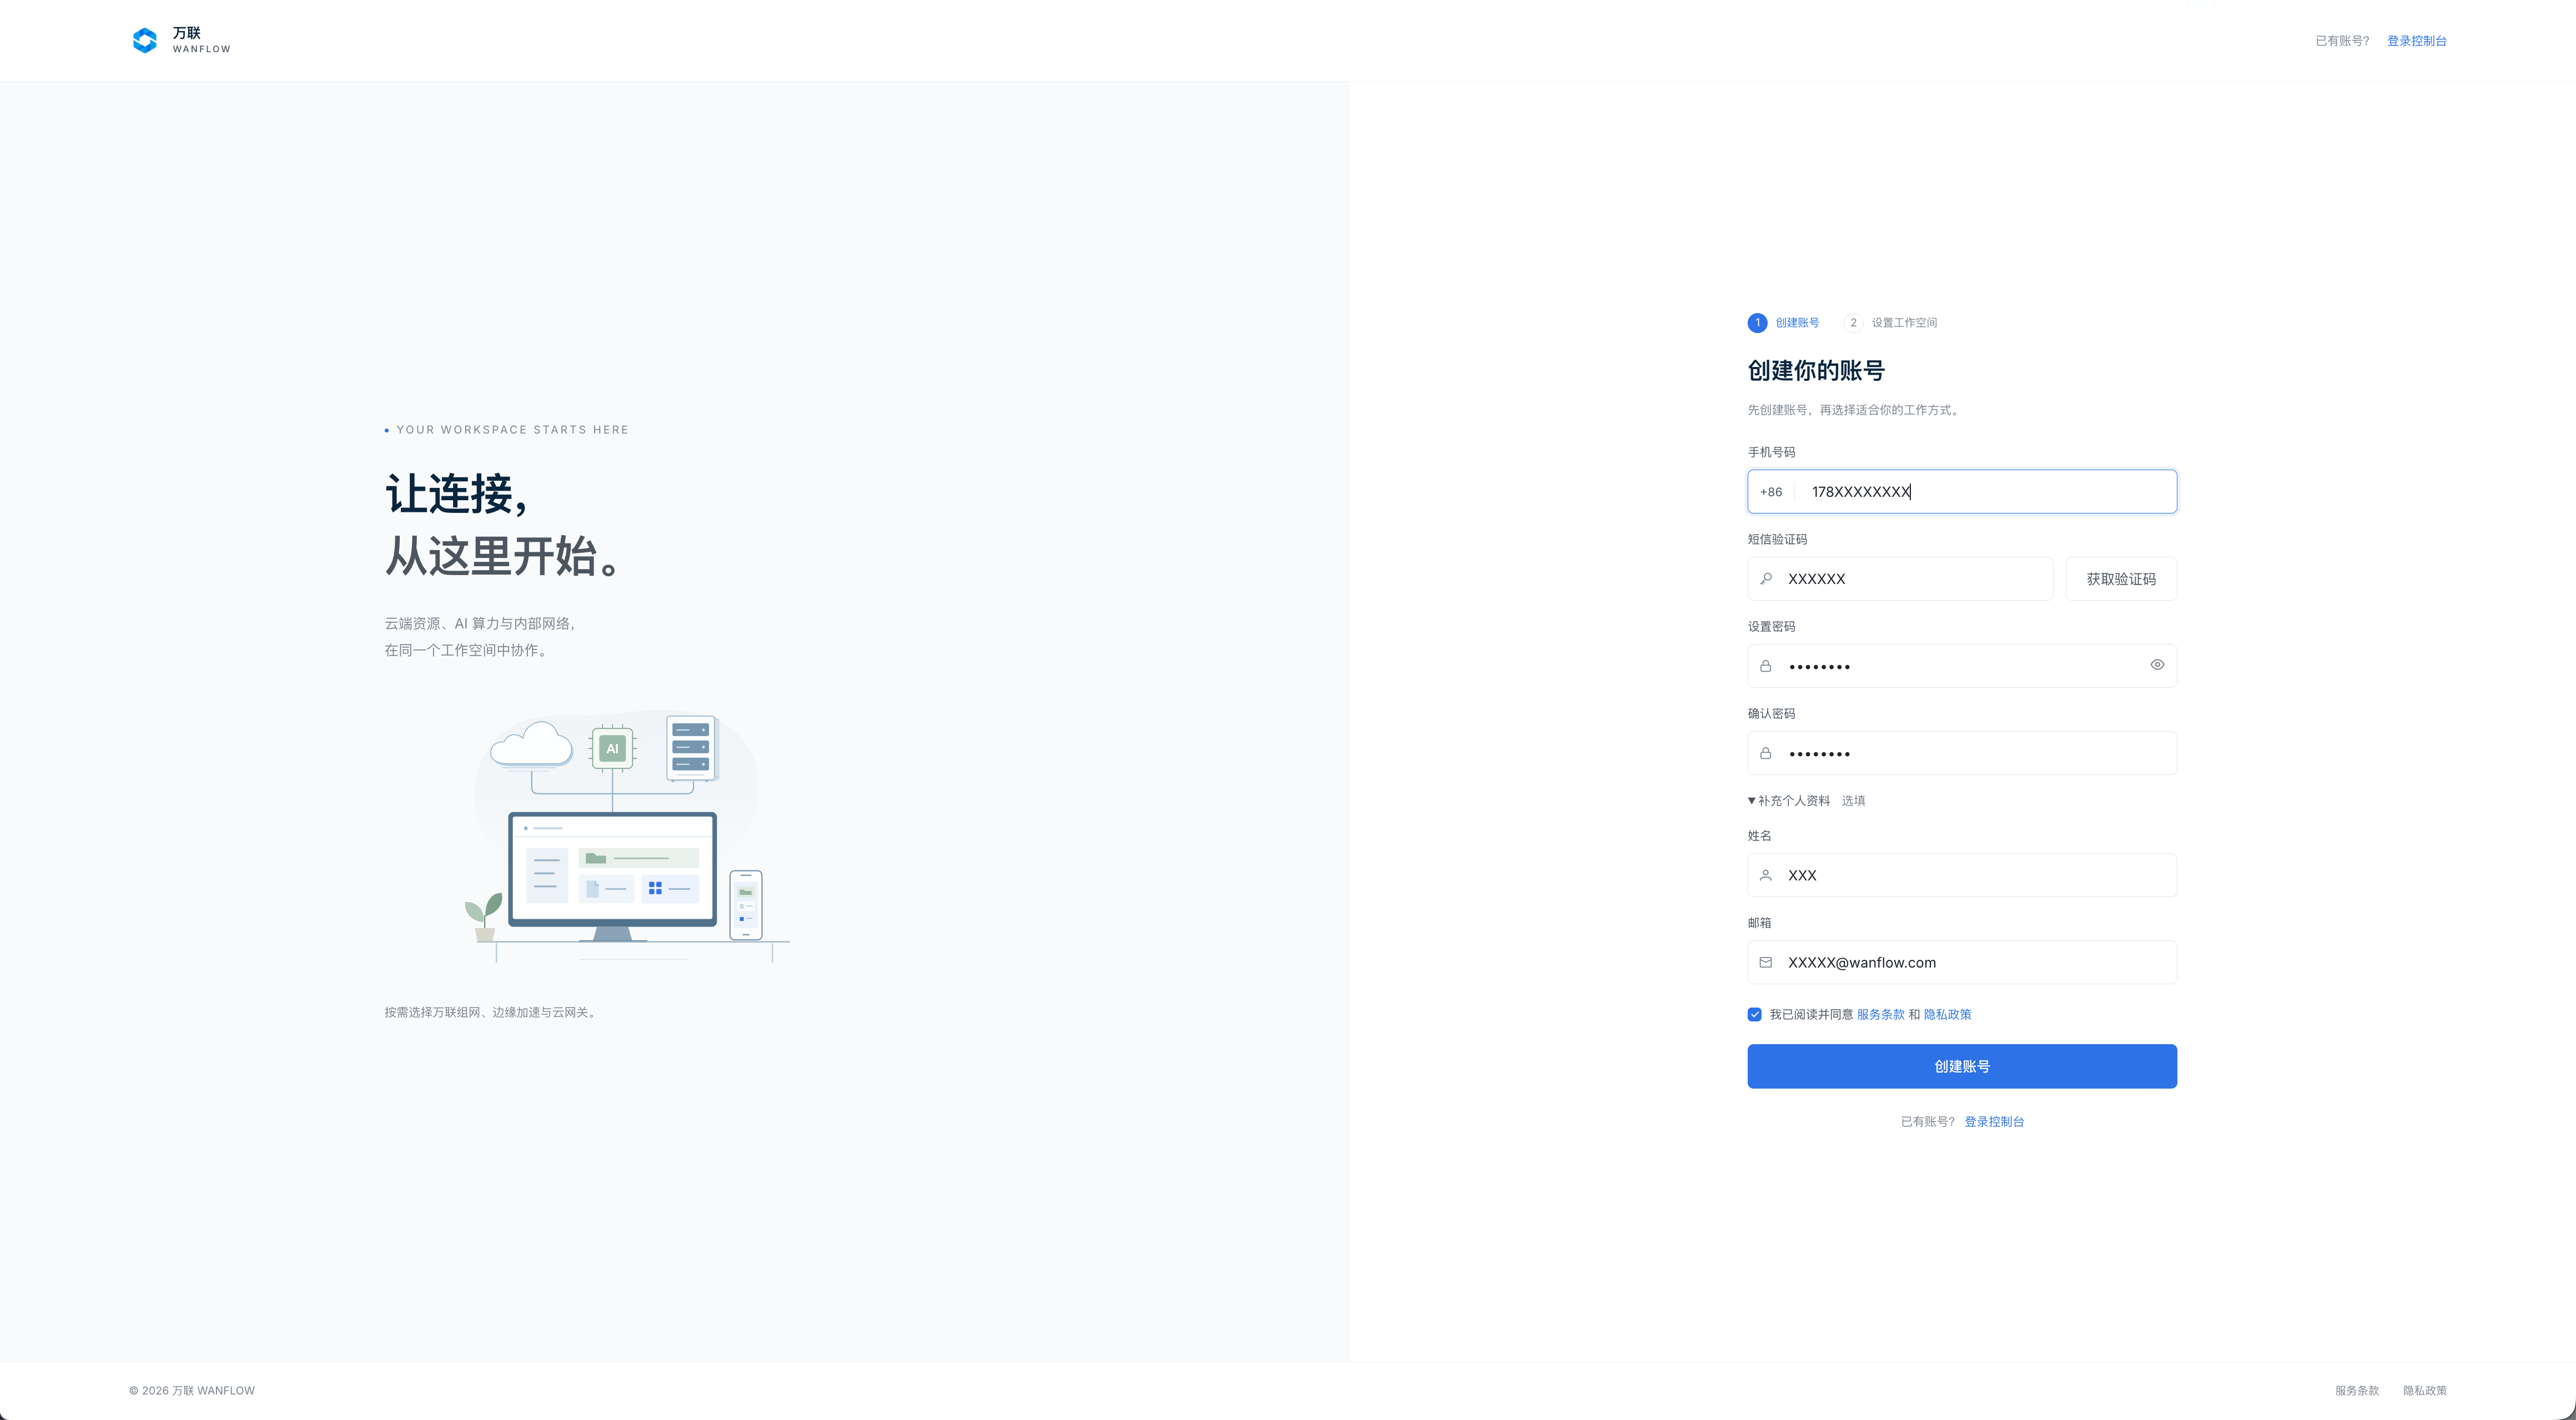
Go to the console sign-up page: console.wanflow.com/auth/register
If a colleague sent you an invitation link, open that link to sign up instead — the top of the form shows 你受邀加入 (You’re invited to join) and the organization name, and the submit button changes to 创建账号并加入组织 (Create account and join organization). After you sign up, you join the organization automatically and can skip Step 2.
- Enter your mobile number and get a verification code
Enter your mobile number, click 获取验证码 (Get verification code), and enter the 6-digit code you receive by SMS. The SMS arrives within about 10 seconds. After the code is sent, a 60-second countdown starts, during which you can’t request another code.
- Set a password
Set a password of at least 8 characters, and enter it again in 确认密码 (Confirm password). The two entries must match.
- (Optional) Add your name and email
Expand 补充个人资料(选填) (Additional profile info (optional)) to enter your name and email. Your name is used as your display name in the organization, so we recommend filling it in; your email is used to receive notifications, and you can also add it later in your profile.
- Accept the terms and submit
Select 我已阅读并同意服务条款和隐私政策 (I have read and agree to the Terms of Service and Privacy Policy), then click 创建账号 (Create account).
Step 2: Create or join an organization
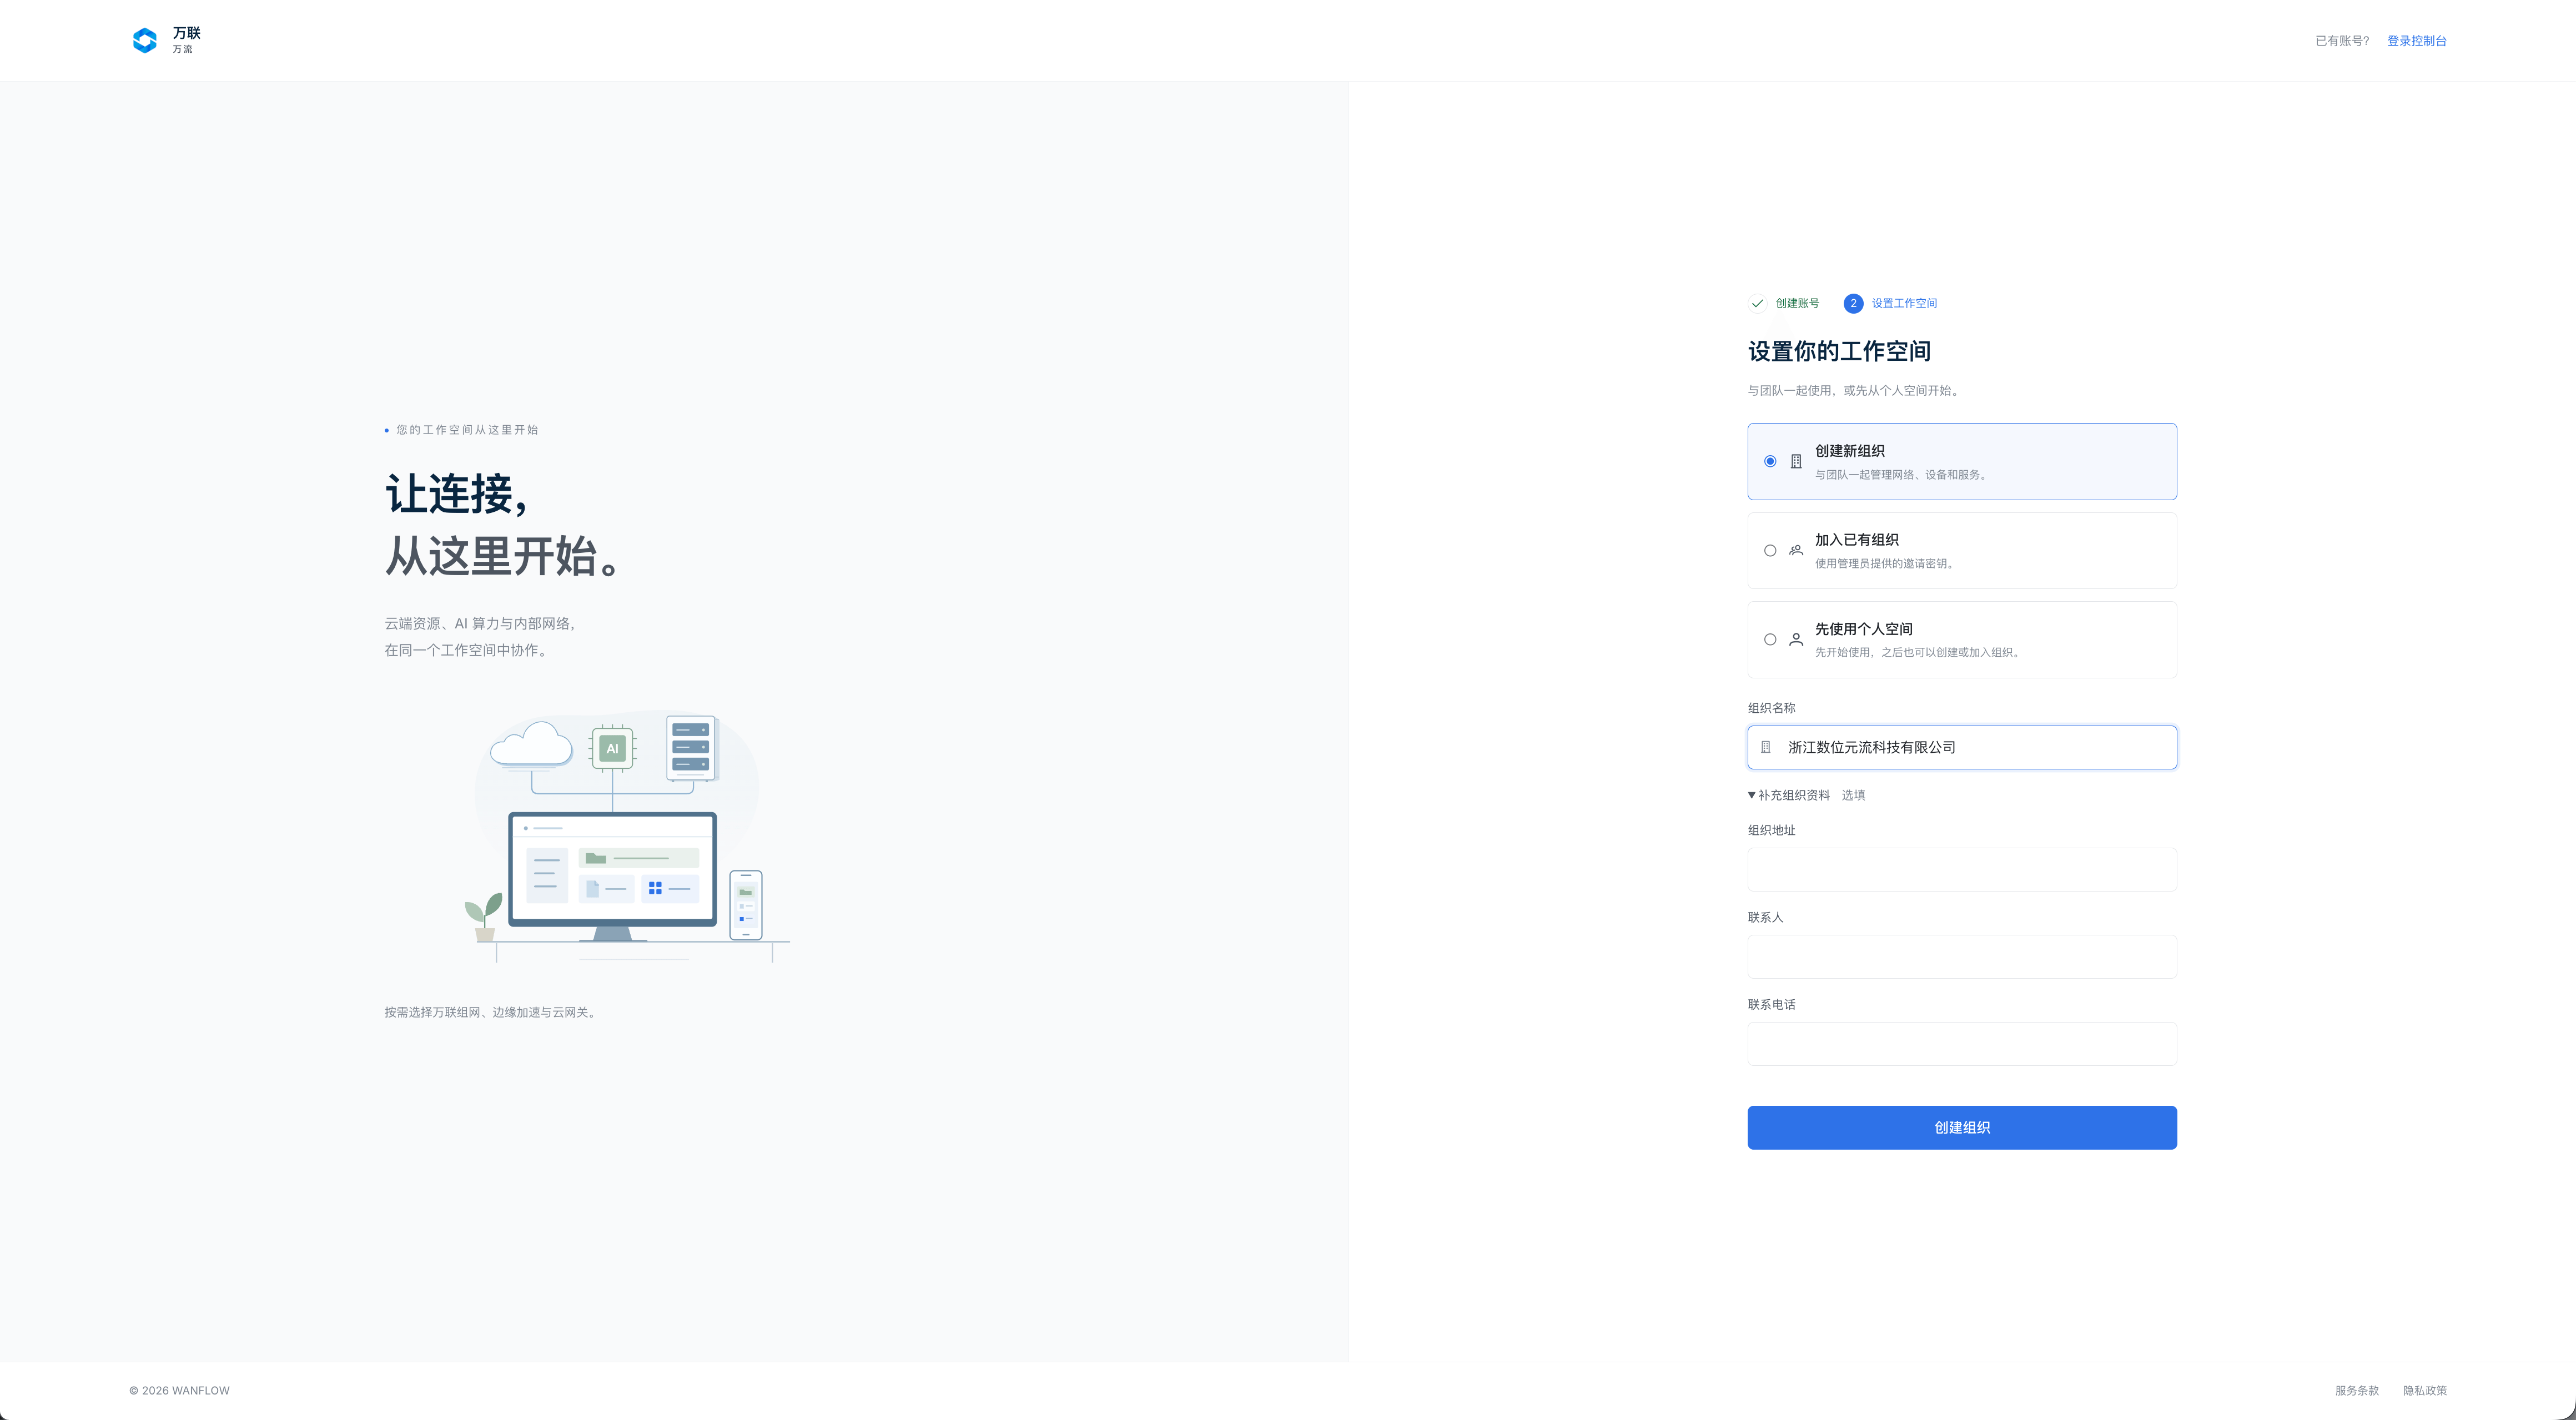
After you sign up, you’re taken to the 设置你的工作空间 (Set up your workspace) page. Choose one of the three options based on your situation:
- Create a new organization — you're the first person at your company to sign up
Only 组织名称 (Organization name) is required. Expand 补充组织资料(选填) (Additional organization info (optional)) to enter the organization address, contact person and contact phone number. If you leave them blank, the contact person defaults to your name and the contact phone number defaults to your mobile number; you can add them later in the organization information. When you’re done, click 创建组织 (Create organization).
- Join an existing organization — a colleague has already created one
Ask the organization admin to generate an invitation link in 成员管理 (Members) and send it to you. If you sign up with an invitation link, you join the organization automatically and don’t need to choose anything in this step.
- Use a personal space first — look around on your own first
The system creates a personal space for you. You can get familiar with the console first, then create or join your company’s organization at any time.
What’s the difference between a personal space and a company organization? You can sign in and browse in a personal space, but team features such as member management and department management don’t appear. When you need to activate services for your team, create a proper company organization.
What you’ll see when you’re done
You land on the console’s 工作空间总览 (Workspace overview). On the left is the feature navigation, grouped into Services, Compliance filing, Devices & Terminals, and Finance; in the middle are three overview cards — 万联组网 (FlowMesh), 边缘加速 (Edge Acceleration) and 云网关 (Cloud Gateway) — followed by the 最近添加的服务 (Recently added services) list; under 常用操作 (Common actions) on the right, you can view organization information, download clients and view connection guides.
Your account is now ready to use. Click 开通服务 (Activate service) in the upper-right corner or 选择服务 (Select service) in the list to start activating a service. Some services require verification first — see the next section.
Next: complete verification
Some Wanflow services require a certain verification level. If you aren’t verified, the order entry shows 需要认证 (Verification required):
| Verification level | Description | When it’s required |
|---|---|---|
| Basic real-name verification | Personal real-name verification, can be completed with a face scan | Before activating basic services |
| Enterprise verification | Submit company qualification documents; requires review | Before activating enterprise services |
Some products currently use assisted activation: even after you complete verification, the page may show 请联系销售经理 (Please contact your sales manager). These services are configured and activated with the help of your account manager. This is the normal process.
FAQ
What if I don’t receive the verification code? First make sure the mobile number is correct and is a mainland China number. You can request the code again after the 60-second countdown ends. If you repeatedly don’t receive it, check whether it’s being blocked by security software on your phone.
Sign-up says the mobile number already exists? This means the number is already registered. Sign in directly, or use 忘记密码 (Forgot password) to recover your account.
Has the invitation link expired? Invitation links have a validity period and a usage limit. Ask the organization admin to generate a new invitation link in 成员管理.
Can I switch to a different organization? After your account joins an organization, you can’t leave or switch organizations yourself. The organization admin has to do this in member management.